This is part 3 of the "Web client communication to Unreal and back" series.
In the final part of this series we'll look at a simple way of communicating from your streaming Unreal game, back to your web client. Once your client is able to receive messages from the game you can create custom behaviour based on the message received.
For part 3 we'll continue using the game and web client that can control our spotlight, by putting a few more pieces into the Level Blueprint. However, you do not need to have completed part 1 or part 2 to follow along.
The basic tasks we need to perform are as follows:
- Capture the desired user event in the game & inform the web client of that event
- Subscribe to the messages from the game in the web client
- Watch for the desired message and do something if it arrives
Capture a user event in Unreal
Let's use a simple user event of pressing the ENTER key, catch it with some logic in the event graph in the Level Blueprint, then create a message to send.
Open your game project and level. For me I'm using the Level1 from part 2 of this series. Open the Level Blueprint window for Level1 and find an empty spot on the Event Graph. We'll start a lot like we did in part 2.
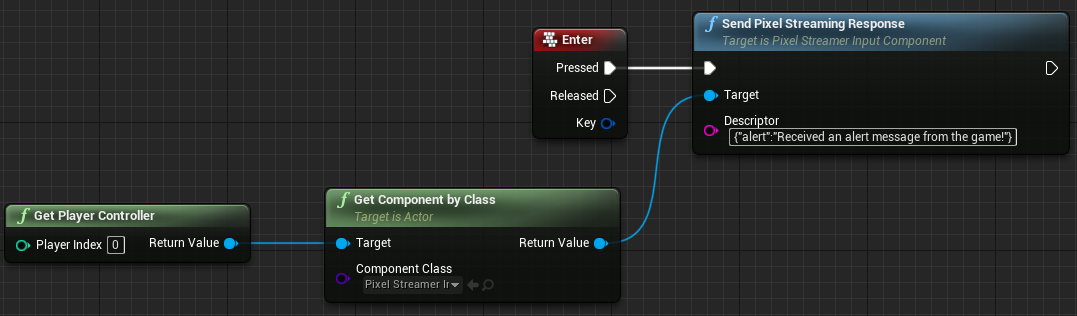
- Add a function node for “Get Player Controller”
- Drag from the Return Value pin of the Get Player Controller node, and create a new function “Get Component by Class” node.
- Change the “Actor Component” under the component class to “PixelStreamerInputComponent”.
- Add a new node for "Enter" (under Input/Keyboard Input Events).
- Drag the Return Value from the “GetComponentsByClass” out to create a “ Send Pixel Streaming Response” node. Note → you may have to uncheck “Context Sensitive” in the popup to find this under the Pixel Streaming Input section.
- Connect the white arrow output from "Pressed" on the Enter node to the white input on our Send Pixel Streaming Response node.
- In the Descriptor, enter the text:
{"alert":"Received an alert message from the game!"}The message contents can be full JSON or simple text depending on your needs. For more complex messaging you may need to create additional nodes or code to define its content.
The message will be sent via the PixelStreaming plugin and become available to the web client...provided the client is set up to watch for it!
We're done what we need to do in the game package, and your graph should resemble this one.
Subscribe to the messages from the game in the web client
In order to do something in the client with our message, we need to subscribe to the messages from the game. This is already done for you in the web client template, but let's take a look at it.
In the App.tsx file, find the declaration for App. This is the actual React App that handles all the good stuff such as initializing the stream, checking the startup options etc. Inside there, around line 325 there is some code that subscribes to messages from the game. It looks similar to the code below:
// Subscribe to game messages
  useEffect(() => {
    const subscription = messageSubject.subscribe(
      (value: string) => {
        logger.info('Message: ' + value);
      },
      (err) => {
        logger.error(err);
      }
    );
What the subscription lets you do is query the MessageSubject of the message from the game and ask if it contains the thing(s) you want.
Process incoming game messages
Although the client subscribes to the incoming messages, it doesn't process them in any way. They are simply written to the logger and then ignored. (If you want to see these, they can be viewed in the developer console of your web browser while the stream is being viewed.)
After the line where the message is written into logger.info, add the following code:
// Parse the received messages
const message = JSON.parse(value);
// Check if our "alert" message is inside and do something with it
if(message.hasOwnProperty("alert")){
alert(message.alert);
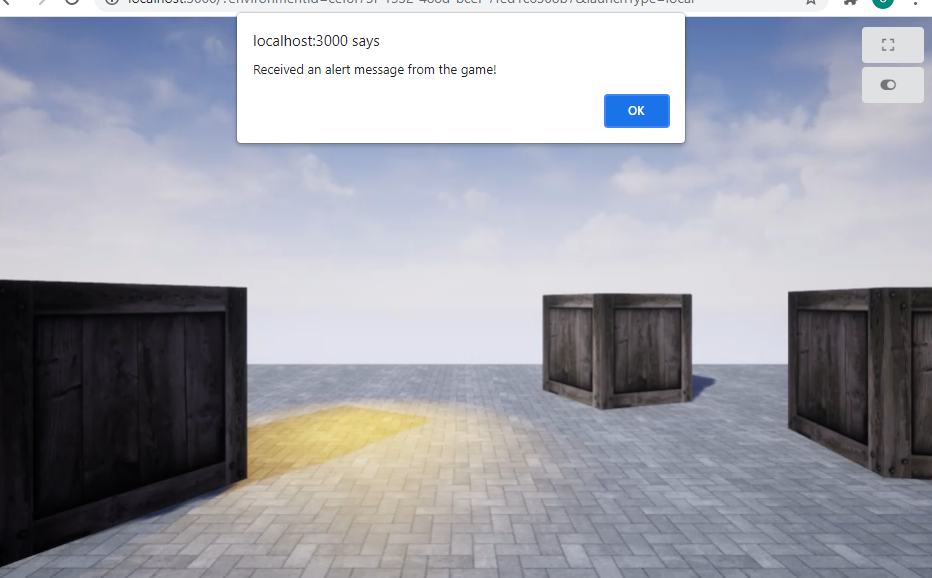
}Now, when the web client receives messages from the game, they will be written to logger.info AND if there is one called "alert" we will pop up a browser alert window to display the contents to the user.
Run your game using the local streaming agent. Try pressing the Enter key through your custom web client. An alert window should pop up on the screen when the web client receives the appropriate message from the game.
Naturally, this would not be the most ideal way to present your users with information, but it should give you the basics necessary for planning and building two-way communication using the PureWeb Reality platform.
For an interesting exercise on your own, you might want to try creating a control in the game that the player could interact with (such as a lever or button). When manipulated, send the state of the light to the web client, and change the value of the variable that controls the icon of the button being displayed.