
In order to use our React web client template make sure you are using a Windows machine, and have the LTS version 16.x or earlier of Node.js installed.
Watch a short video of the process:
Step 1: Install the PureWeb React Web Client Template
A web client allows you to load, display, and stream a 3D experience in the user’s web browser. To install the template:
- Open a command prompt on your local machine and navigate to the folder you want your web client files to reside in.
- Type the command below, where my-app is the name of the folder you want to create.
npx create-react-app my-app --template @pureweb/cra-template-pureweb-clientThis will generate a typescript-based React application, ready for you to customize and configure to your needs.
Having a properly configured package of your experience to stream is a big step forward. Once the basic web client is running, you’ll be able to add in further customizations like authentication, responsive UI elements for different devices such as tablets and mobile, and more.
Step 2: Configure The Web Template to Stream Your Game
In order to point your client at a specific project and model that is already hosted on the PureWeb platform you will need to configure some parameters in the client.json, located in the my-app/src folder you created in the previous step.
{
	"projectId": "b1f3a842-42e1-40b5-9f04-480cf87b59c8",
	"modelId": "72e23f8d-c68b-422d-9f81-004922bfc37a"
}
You can optionally specify a version of the model to use.
{
    "projectId": "b1f3a842-42e1-40b5-9f04-480cf87b59c8",
	"modelId": "72e23f8d-c68b-422d-9f81-004922bfc37a",
    "version": "myProjV2"
}
Note: do not specify an environmentID in the client.json, unless you intend to enable collaboration.
Step 3: Run Your Web Client
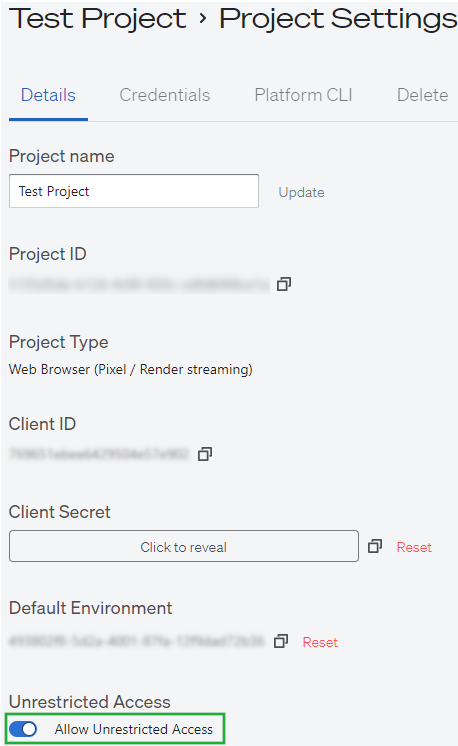
In the PureWeb Reality Console, for the project you selected in Step 2, click the "Project Settings" icon next to the project dropdown.
In the Details tab, enable "Allow Unrestricted Access"
Save any changes you’ve made to your client.json file then return to your command prompt window. Change to the my-app folder (or whatever folder name you created) and run the following command:
npm startYour default browser should automatically open a new tab and start your React web client, you will need to modify the URL to correctly launch a stream. See here for more information:
 PureWeb
Other Useful Commands
npm start → Starts the development server.

ctrl+C → stop running the development server.

npm run build → Bundles the app into static files for production.

npm test → Starts the test runner.

npm run eject → Removes this tool and copies build dependencies, configuration files and scripts into the app directory. If you do this, you can’t go back!
Step 4: Build & Deploy Your Web Client
When you’re happy with your web client, you need to build it for deployment on a web host. In your command prompt window type npm run build to start the process.
Simply follow the output instructions to deploy the build folder.
You can find out more about deploying your web client at https://create-react-app.dev/docs/deployment/.
Step 5: Customize Your Web Client
With your package uploaded to the PureWeb console, and our React web client template ready for customization, you now have all the tools necessary to create a great experience for your clients, customers and fans.
Developing a React App
For more information about developing in React to fully customize your web client, we recommend exploring https://react.dev/learn.
We also some examples to help you get started:
React Developer Tools Plugin

This plugin for your browser (available for Chrome and Firefox) provides the ability to inspect the React component tree with your browser's developer tools. This means that you can check the properties and states of React components on your page, which is incredibly useful during the development process!
After installing the plugin, the React tabs “Components” and “Profiler” should become available in your browser's developer tools. Open the “Components” tab to inspect the component tree of the page. Additionally, you can right-click on any element on the page and click “Inspect” to open the developer tools.
Full-Stack Local Testing
Note that you can combine the local streaming agent described in Test Streaming Locally, with the tools described above to create a complete local testing environment.
References: