The PureWeb SDK provides a host of functionality for communicating between the web client and your streamed Unreal or Unity game package.
For folks new to ReactJS or integrating external inputs into game packages, getting started can be a bit daunting. In this example, focused on Unity, we will look at how to create some basic communication between the web client template and a code file in your Unity game package.
Please read the following articles before proceeding:
Sending Data From the Web Client to Unity
We are going to create a button that will send a message to our game. We will put it underneath the fullscreen button in the top right corner of the web client template.
Define the Button
In the web client, open the App.tsx file in your code editor of choice. Around line 150, find the declaration for EmbeddedView, the first line of which looks something like this:
const EmbeddedView: React.FC<ViewProps> = (props: ViewProps) => {Find the expand button code. It uses the 'expand' icon, so it contains a line like this:
<Icon name="expand" />Add code directly after to create a new button, and place it on the screen with the following code:
<Button
	onClick={() => sendMessageToGame()}
	style={{ position: 'absolute', top: 50, right: 10 }}>
	<Icon name="send" />
</Button>
If we try to run the web client now, it will not do anything yet because we haven't defined the onClick function. Let’s add that now.
Add the ClickHandler to send info to the game
At the top of the EmbeddedView, after the const declarations let's create the sendMessageToGame function like so:
function sendMessageToGame() {
    //create a message
    let message = { type: 'message', contents: 'web client says hi!' };

    //send a message to Unity
    props.InputEmitter.EmitUIInteraction(message);
}
The props.InputEmitter is part of the interface defined in the web client template, and allows us to send information into the game through the PureWeb plugin.
Now when we run our web client and click the button, a message will be generated and sent to the game through the PureWeb plugin. The next step will be creating some code to listen for that message.
Listen For Info From the Web Client in Unity
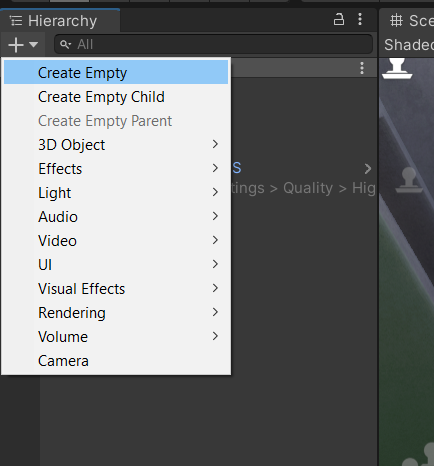
Just like we did with the PureWeb plugin, we will create an empty object and connect a new code file to it.
Create an empty object in your scene. Ours is named Listener, but you can name it whatever you like.

In your project browser, create a C# file to hold our listener code. Ours is named TestListener.cs. Paste or type the following code into it the new file.
using System.Collections;
using System.Collections.Generic;
using System.Text;
using UnityEngine;

public class TestListener : MonoBehaviour
{
    // Start is called before the first frame update
    void Start()
    {
    	//listen for incoming events from the PureWeb plugin
        PureWeb.PureWebStreaming.Instance.InteractionEvent += Instance_InteractionEvent;
    }

    struct Message
    {
        public string contents;
    }

    private void Instance_InteractionEvent(object sender, PureWeb.InteractionEventArgs e)
    {
    	//grab the incoming message
        var message = PureWeb.PlatformMessaging.Deserialize<Message>(e.Bytes);

		//output the message to the Debug console
        if (message.contents != null)
        {
            Debug.LogFormat("{0} {1}", e.Bytes.Length, Encoding.Unicode.GetString(e.Bytes));
        }
    }
}
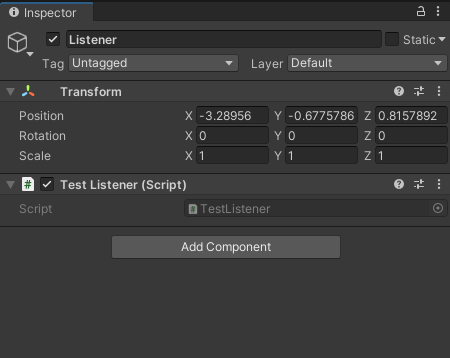
Finally, connect the script to the Listener empty object.
- Click on the Listener object in Hierarchy window
- In the Inspector window, click the "Add Component" button and find the TestListener script.
It should look like the below image when you're finished.

Next we need to test that the messages from the web client are being correctly received. We will use the local streaming agent to connect to our game for this test.
Test that your message is arriving
PRO TIP: You can start the streaming agent and then run your game with the play button, rather than creating an EXE package and running that. It will connect to the streaming agent, which you can then stream in a local web client. This will allow for better debugging before you package the game for upload.
- In a command window, start the local streaming agent
- Press the PLAY button in Unity. (You should see the streaming agent connect to the stream in the command window.)
- In a second command window, start your local web client
- Connect to the local stream with http://localhost:3000/?environmentId=[environment-id]&launchType=local
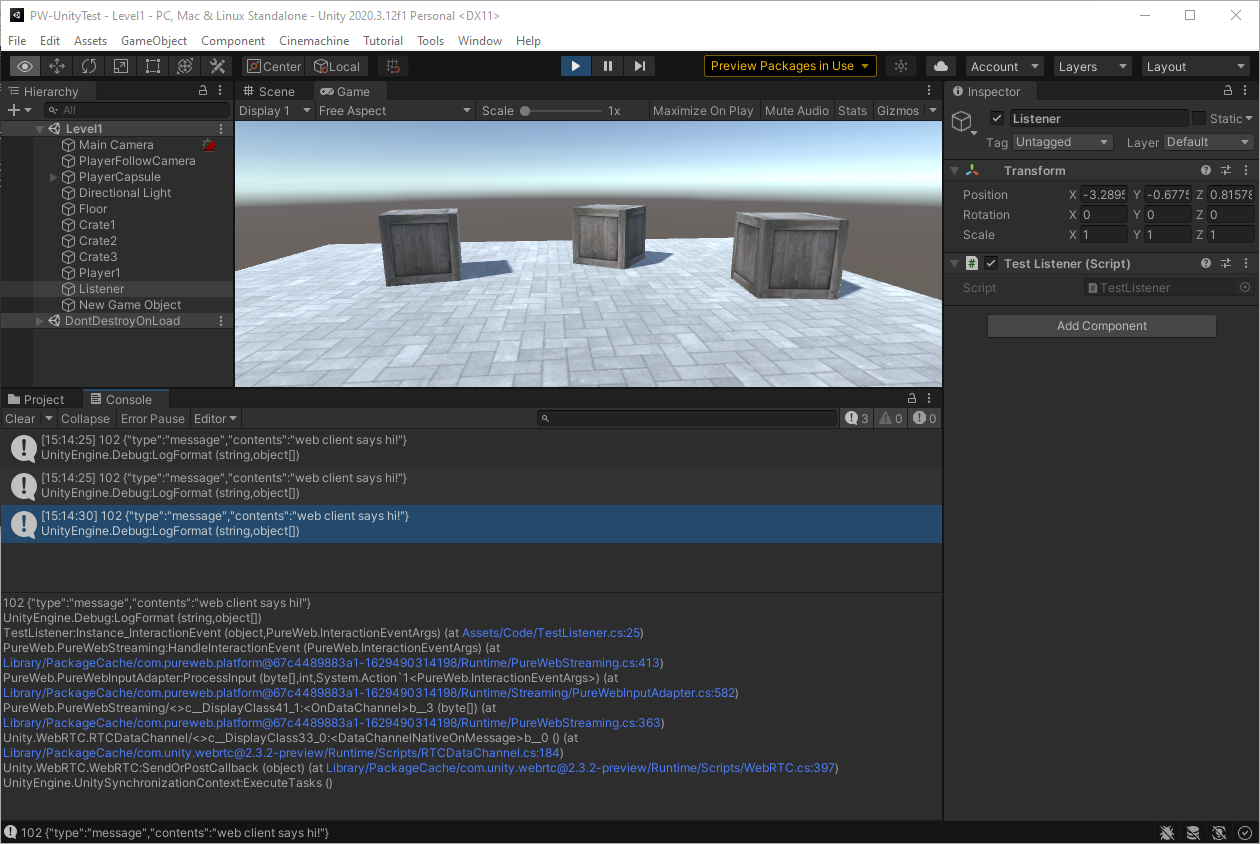
When we click on the send button in our web client, a message appears in the Unity debug console, which contains the information we sent!

Send a message from Unity and consume it in your web client
To bring things full circle, we'll look at a simple way of communicating from your streaming Unity game back to your web client using the Broadcast function in the PureWeb plugin.
Once your client is able to receive messages from the game you can create custom behaviour based on the message received.
Create a message in the game
For simplicity, we will send a message back to the client right after we receive one from it. In your TestListener.cs script file, modify the code as follows:
if (message.contents != null)
	{
		Debug.LogFormat("{0} {1}", e.Bytes.Length, Encoding.Unicode.GetString(e.Bytes));
        PureWeb.PureWebStreaming.Instance.Broadcast<Message>(message);

        //create a message object
        Message toSend = new Message();
        toSend.contents = "{'alert':'Received an alert message from the game!'}";

        //send the message to the web client
        PureWeb.PureWebStreaming.Instance.Broadcast<Message>(toSend);
	}
Subscribe to messages from the game in the web client
In order to do something in the client with our message, we need to subscribe to the messages from the game. This is already done for you in the web client template, but let's take a look at it.
In the App.tsx file, find the declaration for App. This is the actual React App that handles all the good stuff such as initializing the stream, checking the startup options etc. Inside there, around line 345 there is piece of code that subscribes to messages from the game. It looks similar to the below:
// Subscribe to game messages
  useEffect(() => {
    const subscription = messageSubject.subscribe(
      (value: string) => {
        logger.info('Message: ' + value);
      },
      (err) => {
        logger.error(err);
      }
    );

    return () => {
      subscription.unsubscribe();
    };
  }, [messageSubject]);
What the subscription lets you do is query the MessageSubject of the message from the game and ask if it contains the thing(s) you want.
Process incoming game messages
Although the client subscribes to the incoming messages, it doesn't process them in any way. They are simply written to the logger and then ignored. (If you want to see these, they can be viewed in the developer console of your web browser while the stream is being viewed.)
After the line where the message is written into logger.info, add the following code:
// Parse the received messages
const message = JSON.parse(value);

// Check if our "alert" message is inside and do something with it
if(message.hasOwnProperty("alert")){
	alert(message.alert);
}
Now, when the web client receives messages from the game, they will be written to logger.info AND if there is one called "alert" we will pop up a browser alert window to display the contents to the user.
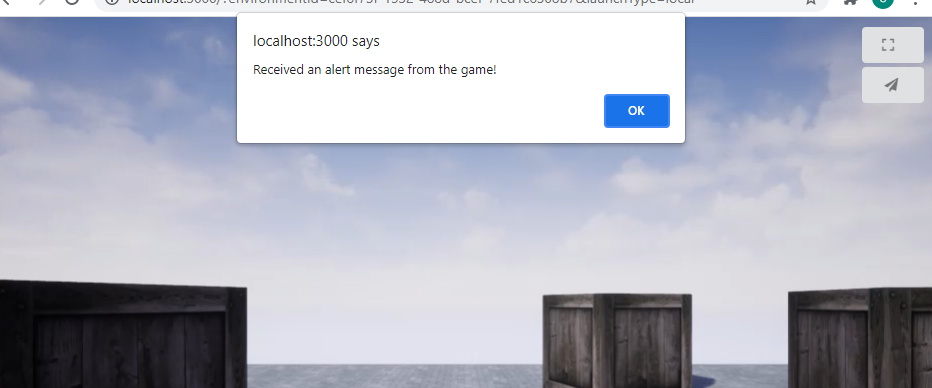
Run your game using the local streaming agent. When you click on the send button in your web client, an alert window should pop up on the screen to show that the message has been received from Unity.

Naturally, this would not be the most ideal way to present your users with information, but it should give you the basics necessary for planning and building two-way communication using the PureWeb Reality platform.

