The PureWeb console is where you manage all of your projects and models.
Projects
Create a Project
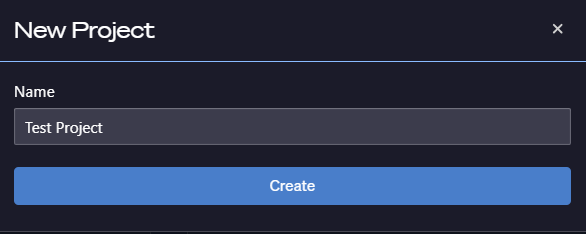
New projects can be created easily by clicking the [+] icon in the header bar and selecting "Create new project +"

Give your project a name in the popup window and click “Create.” Your project should now show up in the dropdown list.
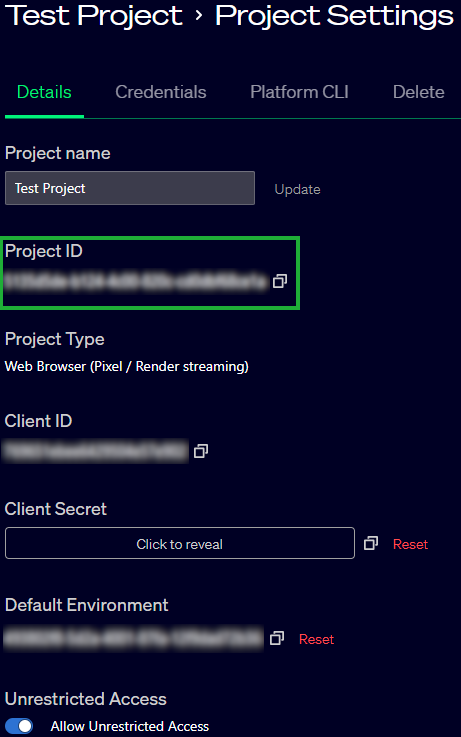
Project ID
Each project in your account will have a unique identifier. You can find this in the Project Settings window, by clicking on the gear icon next to the project drop-down list.
Capacity Providers
There are three different deployment options for capacity providers available on the PureWeb Reality platform:
- Scheduled
- On-Demand, and
- Hybrid
This is important because the capacity provider settings are set on a per-project basis. All of the models in a project will share the same configuration.
For example: Imagine we have models with different requirements. Some models need scheduled resources for set times or user volume. A few models will be intermittently used, and well suited to on-demand or a hybrid deployment.
At a minimum, a project would need to be created for each deployment option, because all of the models in each of these projects would use that option.
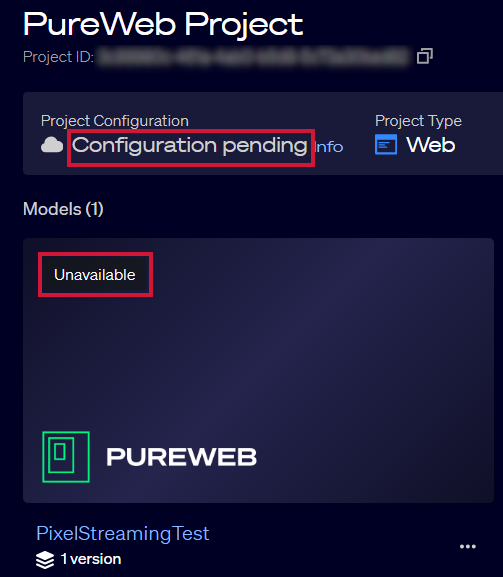
NOTE: When a new project is created it will have no capacity provider configured. Requests to enable new projects can be submitted through your sales representative or support.
How Can I Tell?
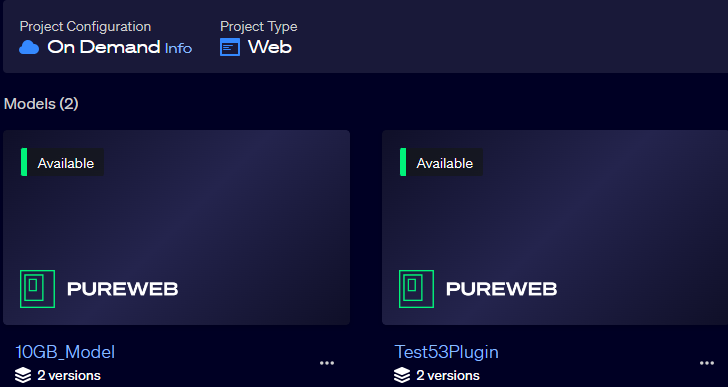
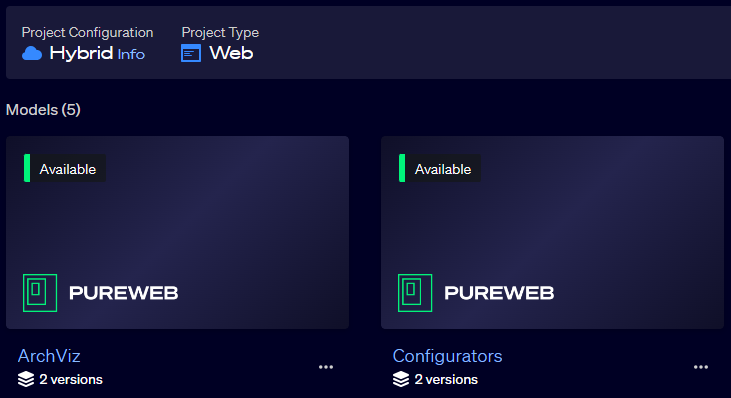
Each model tile in the console shows what deployment option it is using.
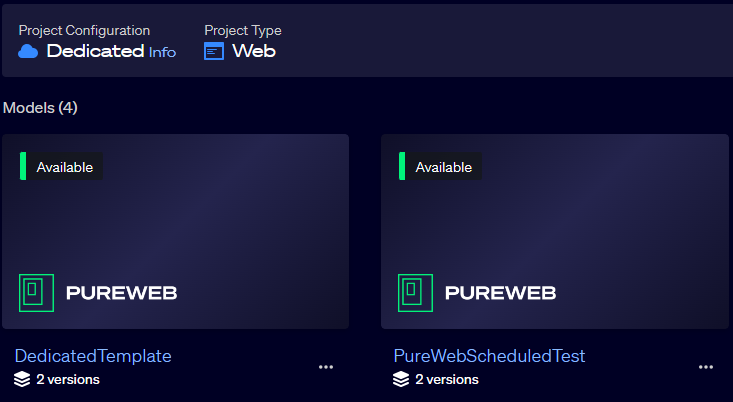
For scheduled and hybrid it's important to remember that each model requires a deployment record. Please be sure to discuss this with your sales representative.
Models
A project can contain any number of models.
NOTE: We highly recommend giving each of the models in your account a unique name.
Model ID
Each model in your account will have a unique identifier. Click on the ellipsys in the bottom right corner of each model tile, then select Details to open the Model Details window.
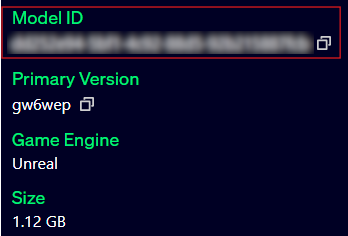
Multiple Model Versions
It is possible to have two different versions of your model uploaded at the same time. One of the models will be marked as the primary, and will be streamed when accessed through your web client.
Both versions are available, which makes this ideal for testing changes or updates to the package without impacting users of the currently default model.
When uploading a new model, you can set it to be marked as primary. Or you can change which model is the primary version at any time in the model management window.
Targeting Model Version
Each version of the model can be targeted in the preview client or custom web client URL, or provided in the configuration of your custom web client.
{
    "projectId": "b1f3a842-42e1-40b5-9f04-480cf87b59c8",
	"modelId": "72e23f8d-c68b-422d-9f81-004922bfc37a",
    "version": "myProjV2"
}If you plan to target a specific version of your model, please be aware that the version number is automatically generated at upload time. If a new version is uploaded, the new version number will need to be used.